Single Sign On
What is Single Sign On?
Single sign on, or SSO, allows you to log into your Giant Giving instance without a username and password. Instead, you use an account that you already have with a provider such as Microsoft or Google. Giant Giving cannot see your SSO provider password at any time.
Why use SSO?
It makes life easier for admin users of Giant Giving, because they're probably already logged into their Microsoft or Google account, so logging into Giant Giving is a couple of clicks away. It also allows IT staff to control who can log into the system easily, and access can be revoked if a user leaves the organisation, simply by disabling or removing their SSO account, just as you normally would in those circumstances.
Which providers do you support?
Right now we support two providers: Microsoft and Google.
How do I configure Giant Giving to use SSO?
You need to perform some basic setup within each provider that you want to use. For most organisations, you'll usually only set up one provider, but Giant Giving supports multiple providers at the same time.
In each provider, you'll need to say that you want Giant Giving to be allowed to authenticate. You usually do this by creating an "app" or "application" configuration within the provider.
Follow the guides below to activate SSO for your chosen provider(s)
Configure Microsoft SSO (Entra)
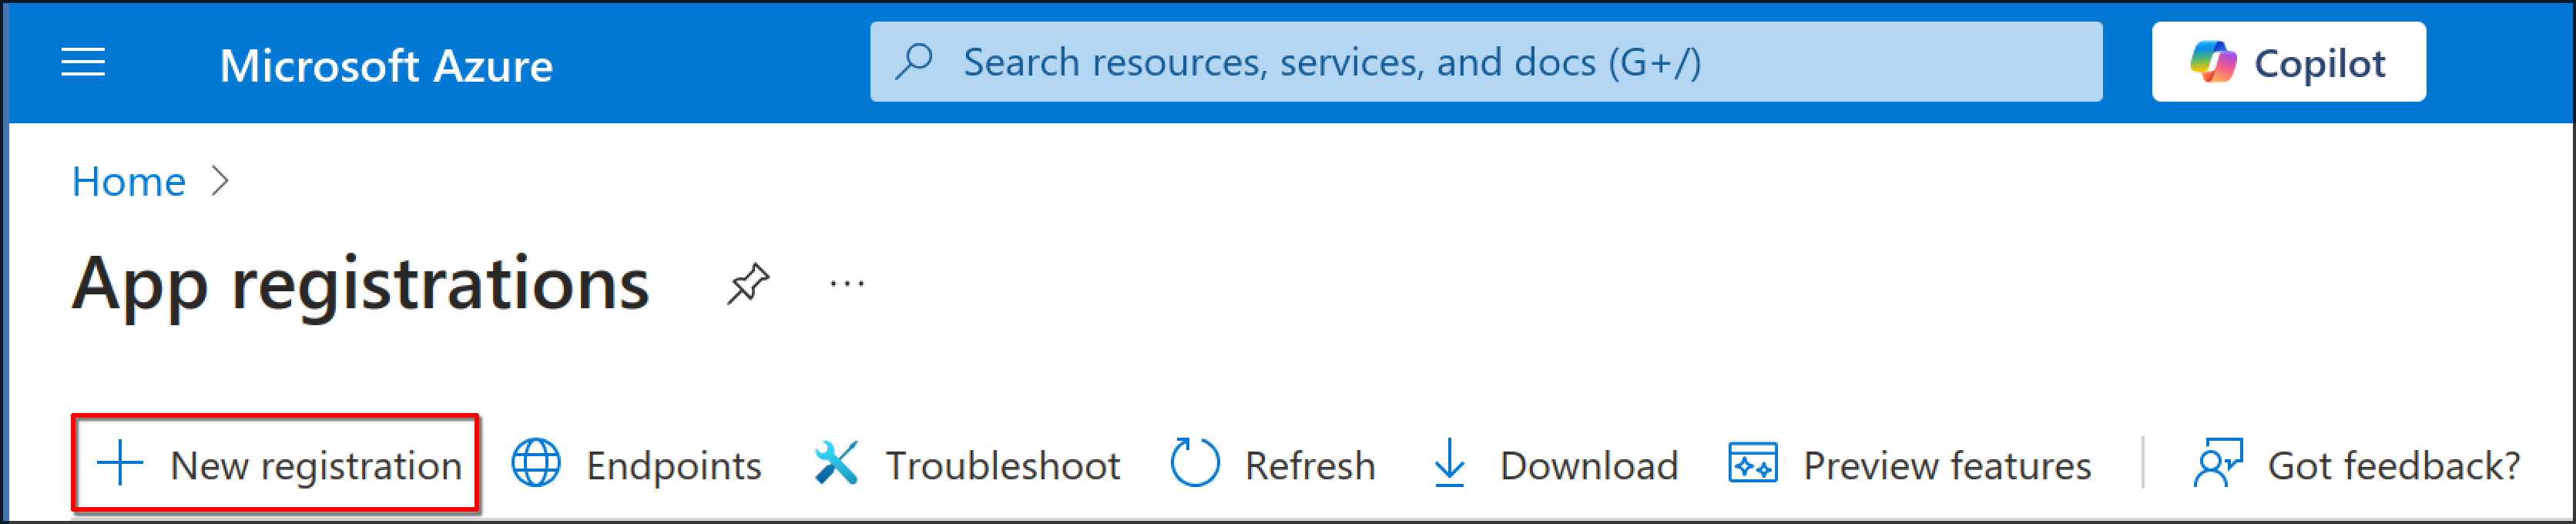
- As an Entra administrator, go to the Entra Dashboard
-
Select "New registration"
-
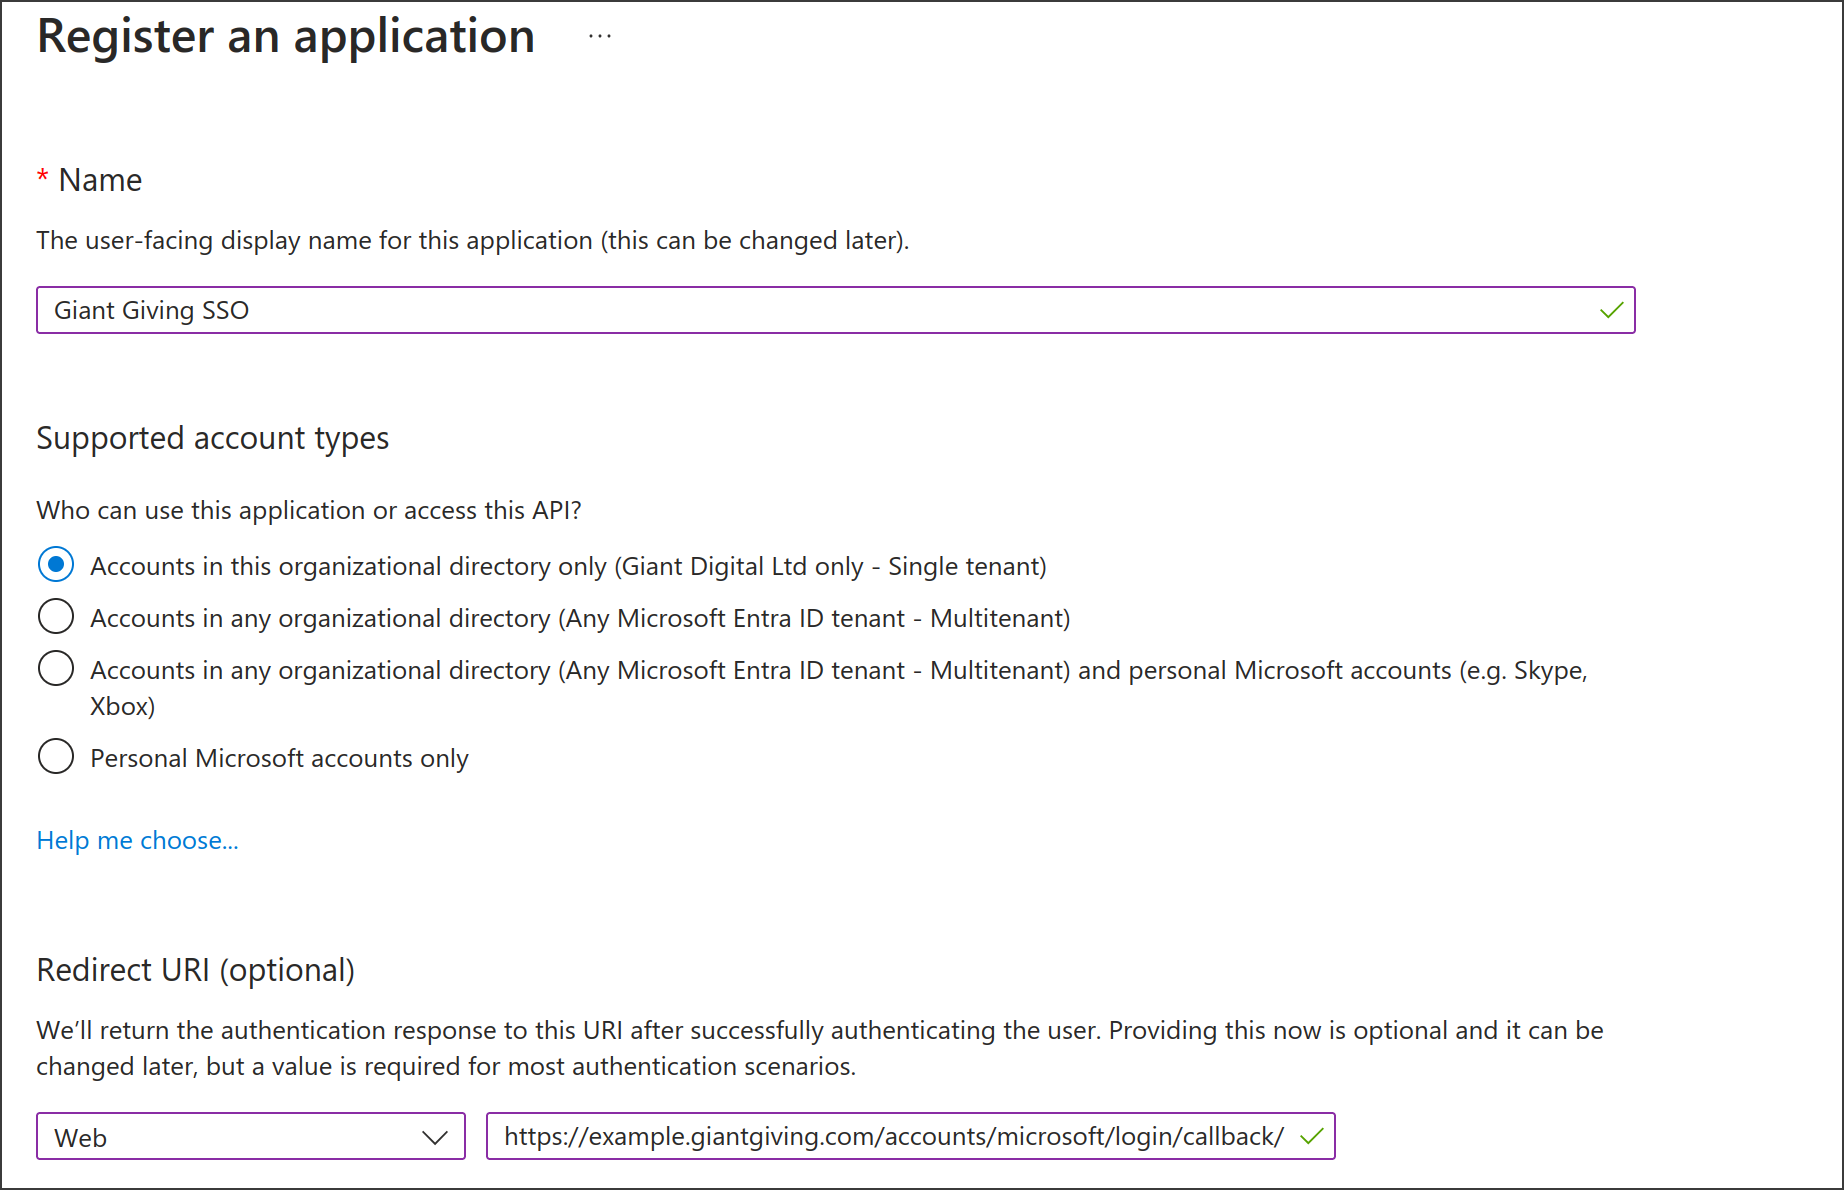
Enter a name for the application. We would suggest "Giant Giving SSO"
- Select "Accounts in this organizational directory only - Single tenant" for supported account types
-
Under "Redirect URI", pick "Web" for the platform, then enter https://GIANT_GIVING_URL_HERE/accounts/microsoft/login/callback/ as the redirect URL. Replace GIANT_GIVING_URL_HERE with the URL to your Giant Giving instance
-
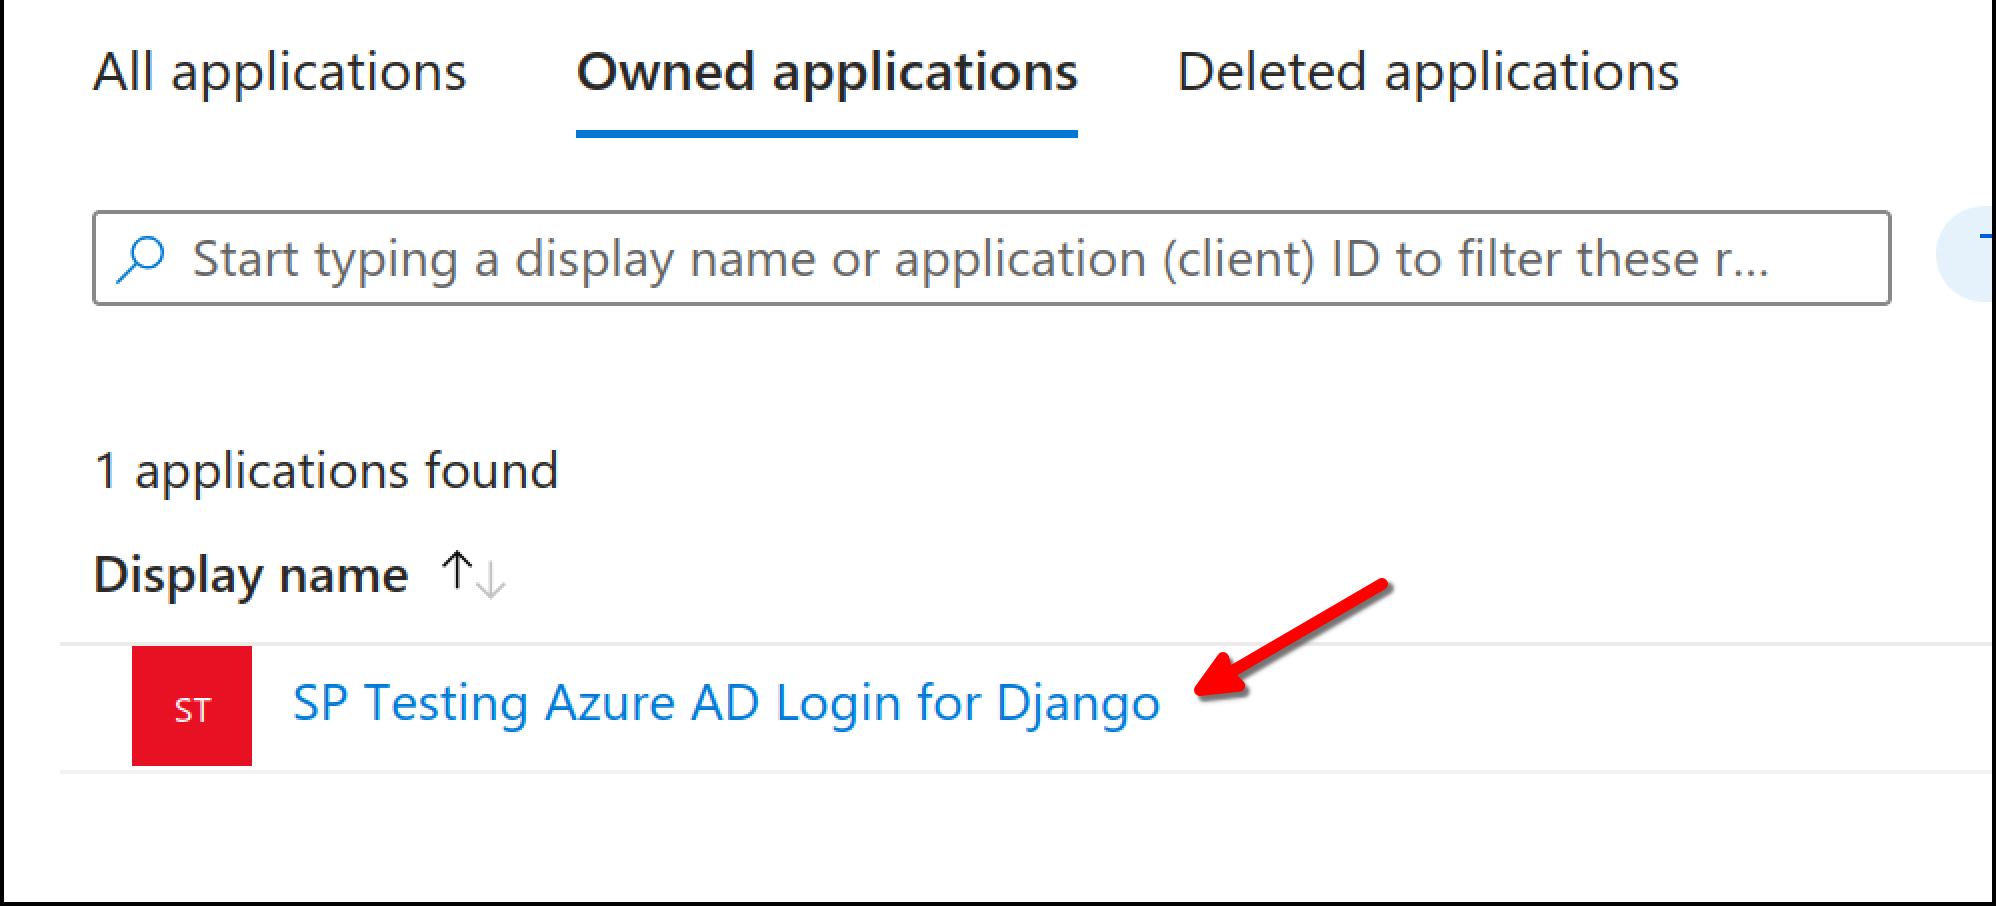
Once you have created your app, click on it from the "App registrations" screen
-
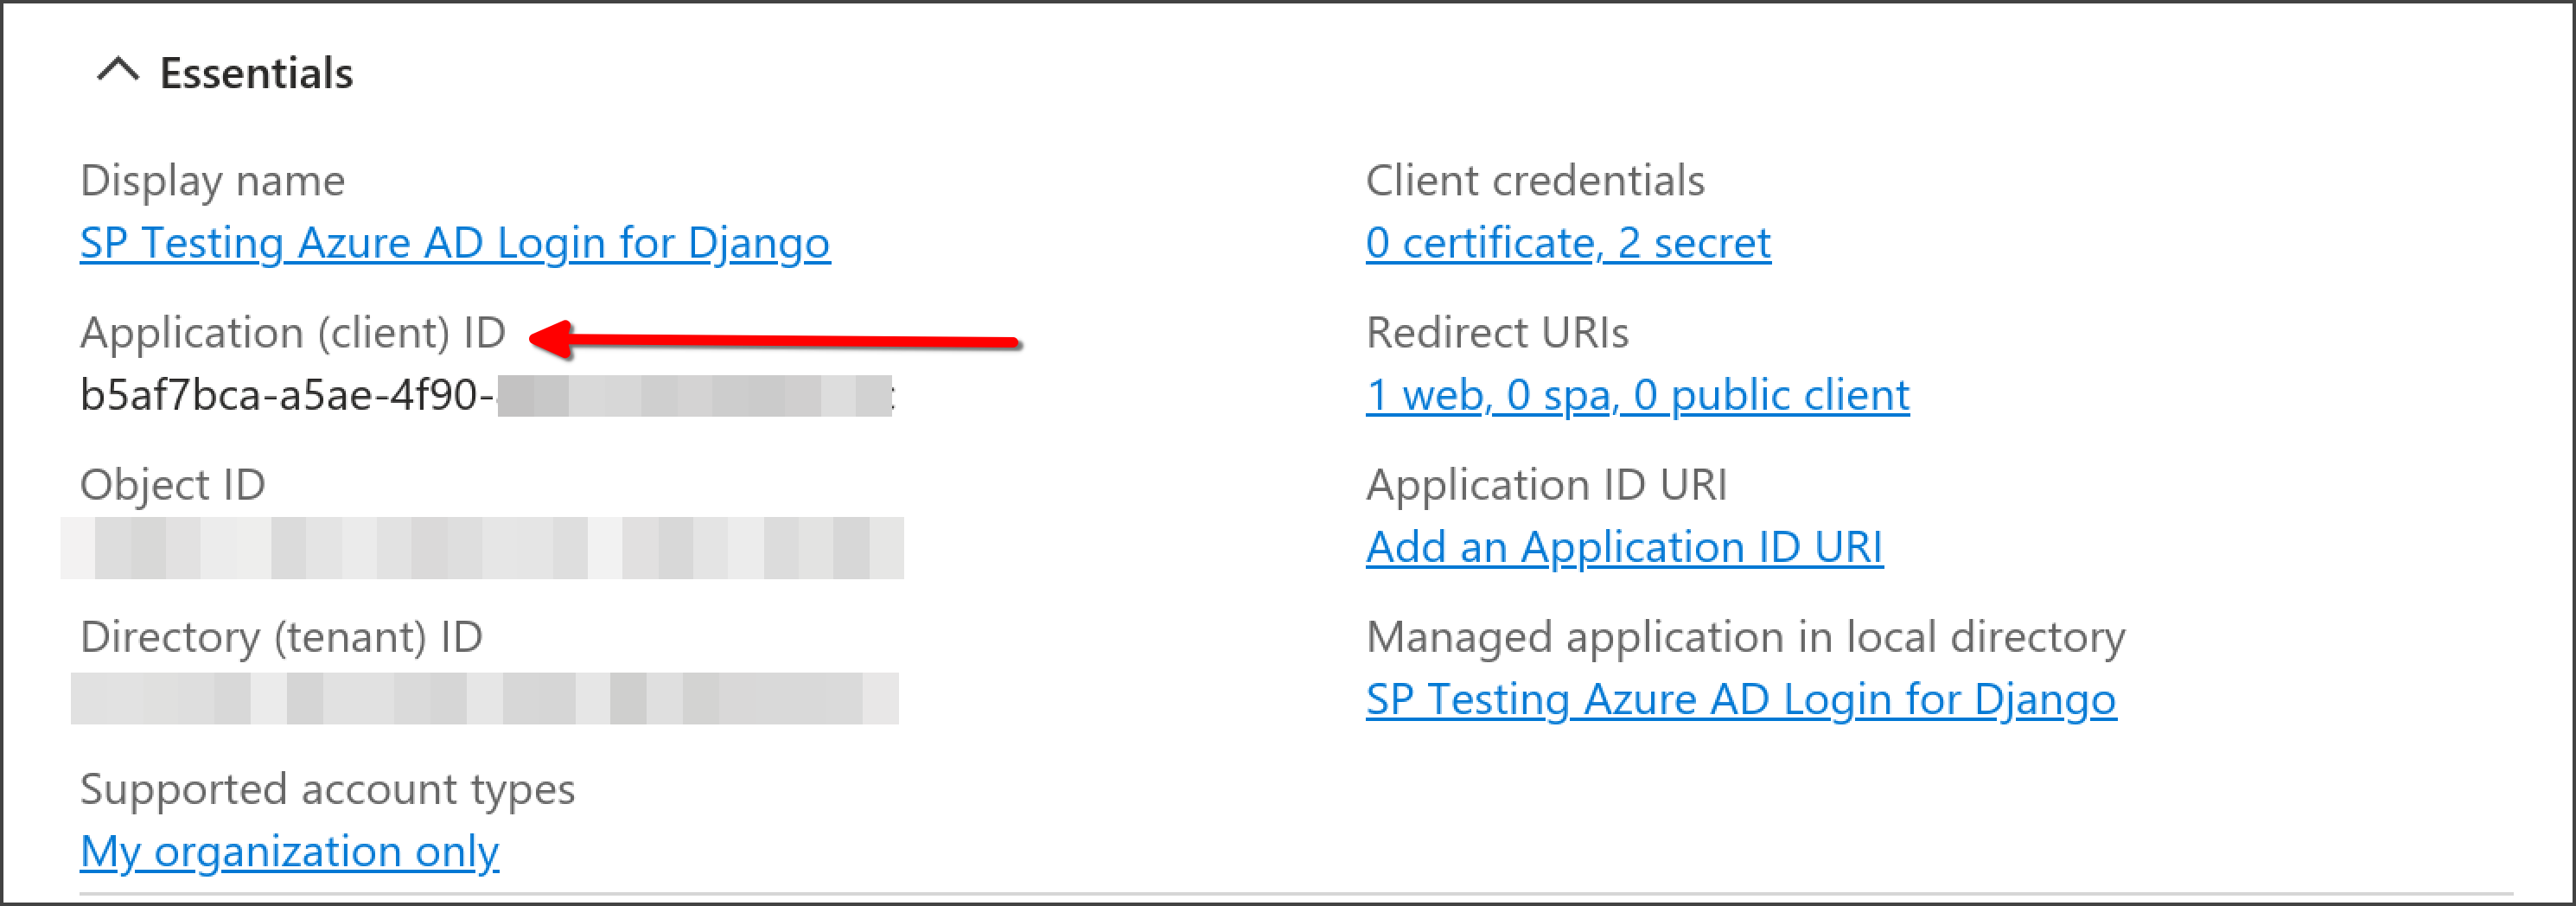
Make a note of the "Application (client) ID" - you'll need it later.
-
On the left of the screen, click "Manage" > "Certificates & secrets"
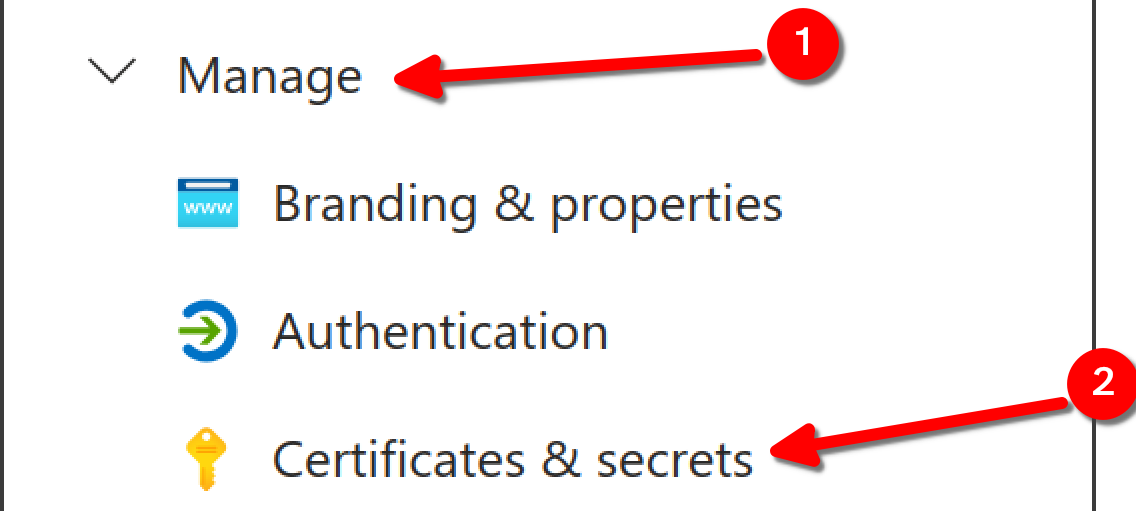
-
Under "Client secrets" click "New client secret"
- Provide a description. We suggest "Giant Giving SSO"
-
For expiry, select as long a period as you are comfortable with
Secret Expiry
Remember that you will have to log into the Entra dashboard everytime your secret expires, so set it as long as possible
-
You should copy the "Value" and "Secret ID" from the client secret listing
Info
You can only view the secret value once, so ensure that you copy the value otherwise you'll have to create a new secret
-
Go to your Giant Giving Dashboard and navigate to "Settings" > "Single sign on"
-
Tick the box that says "Is single sign on enabled"
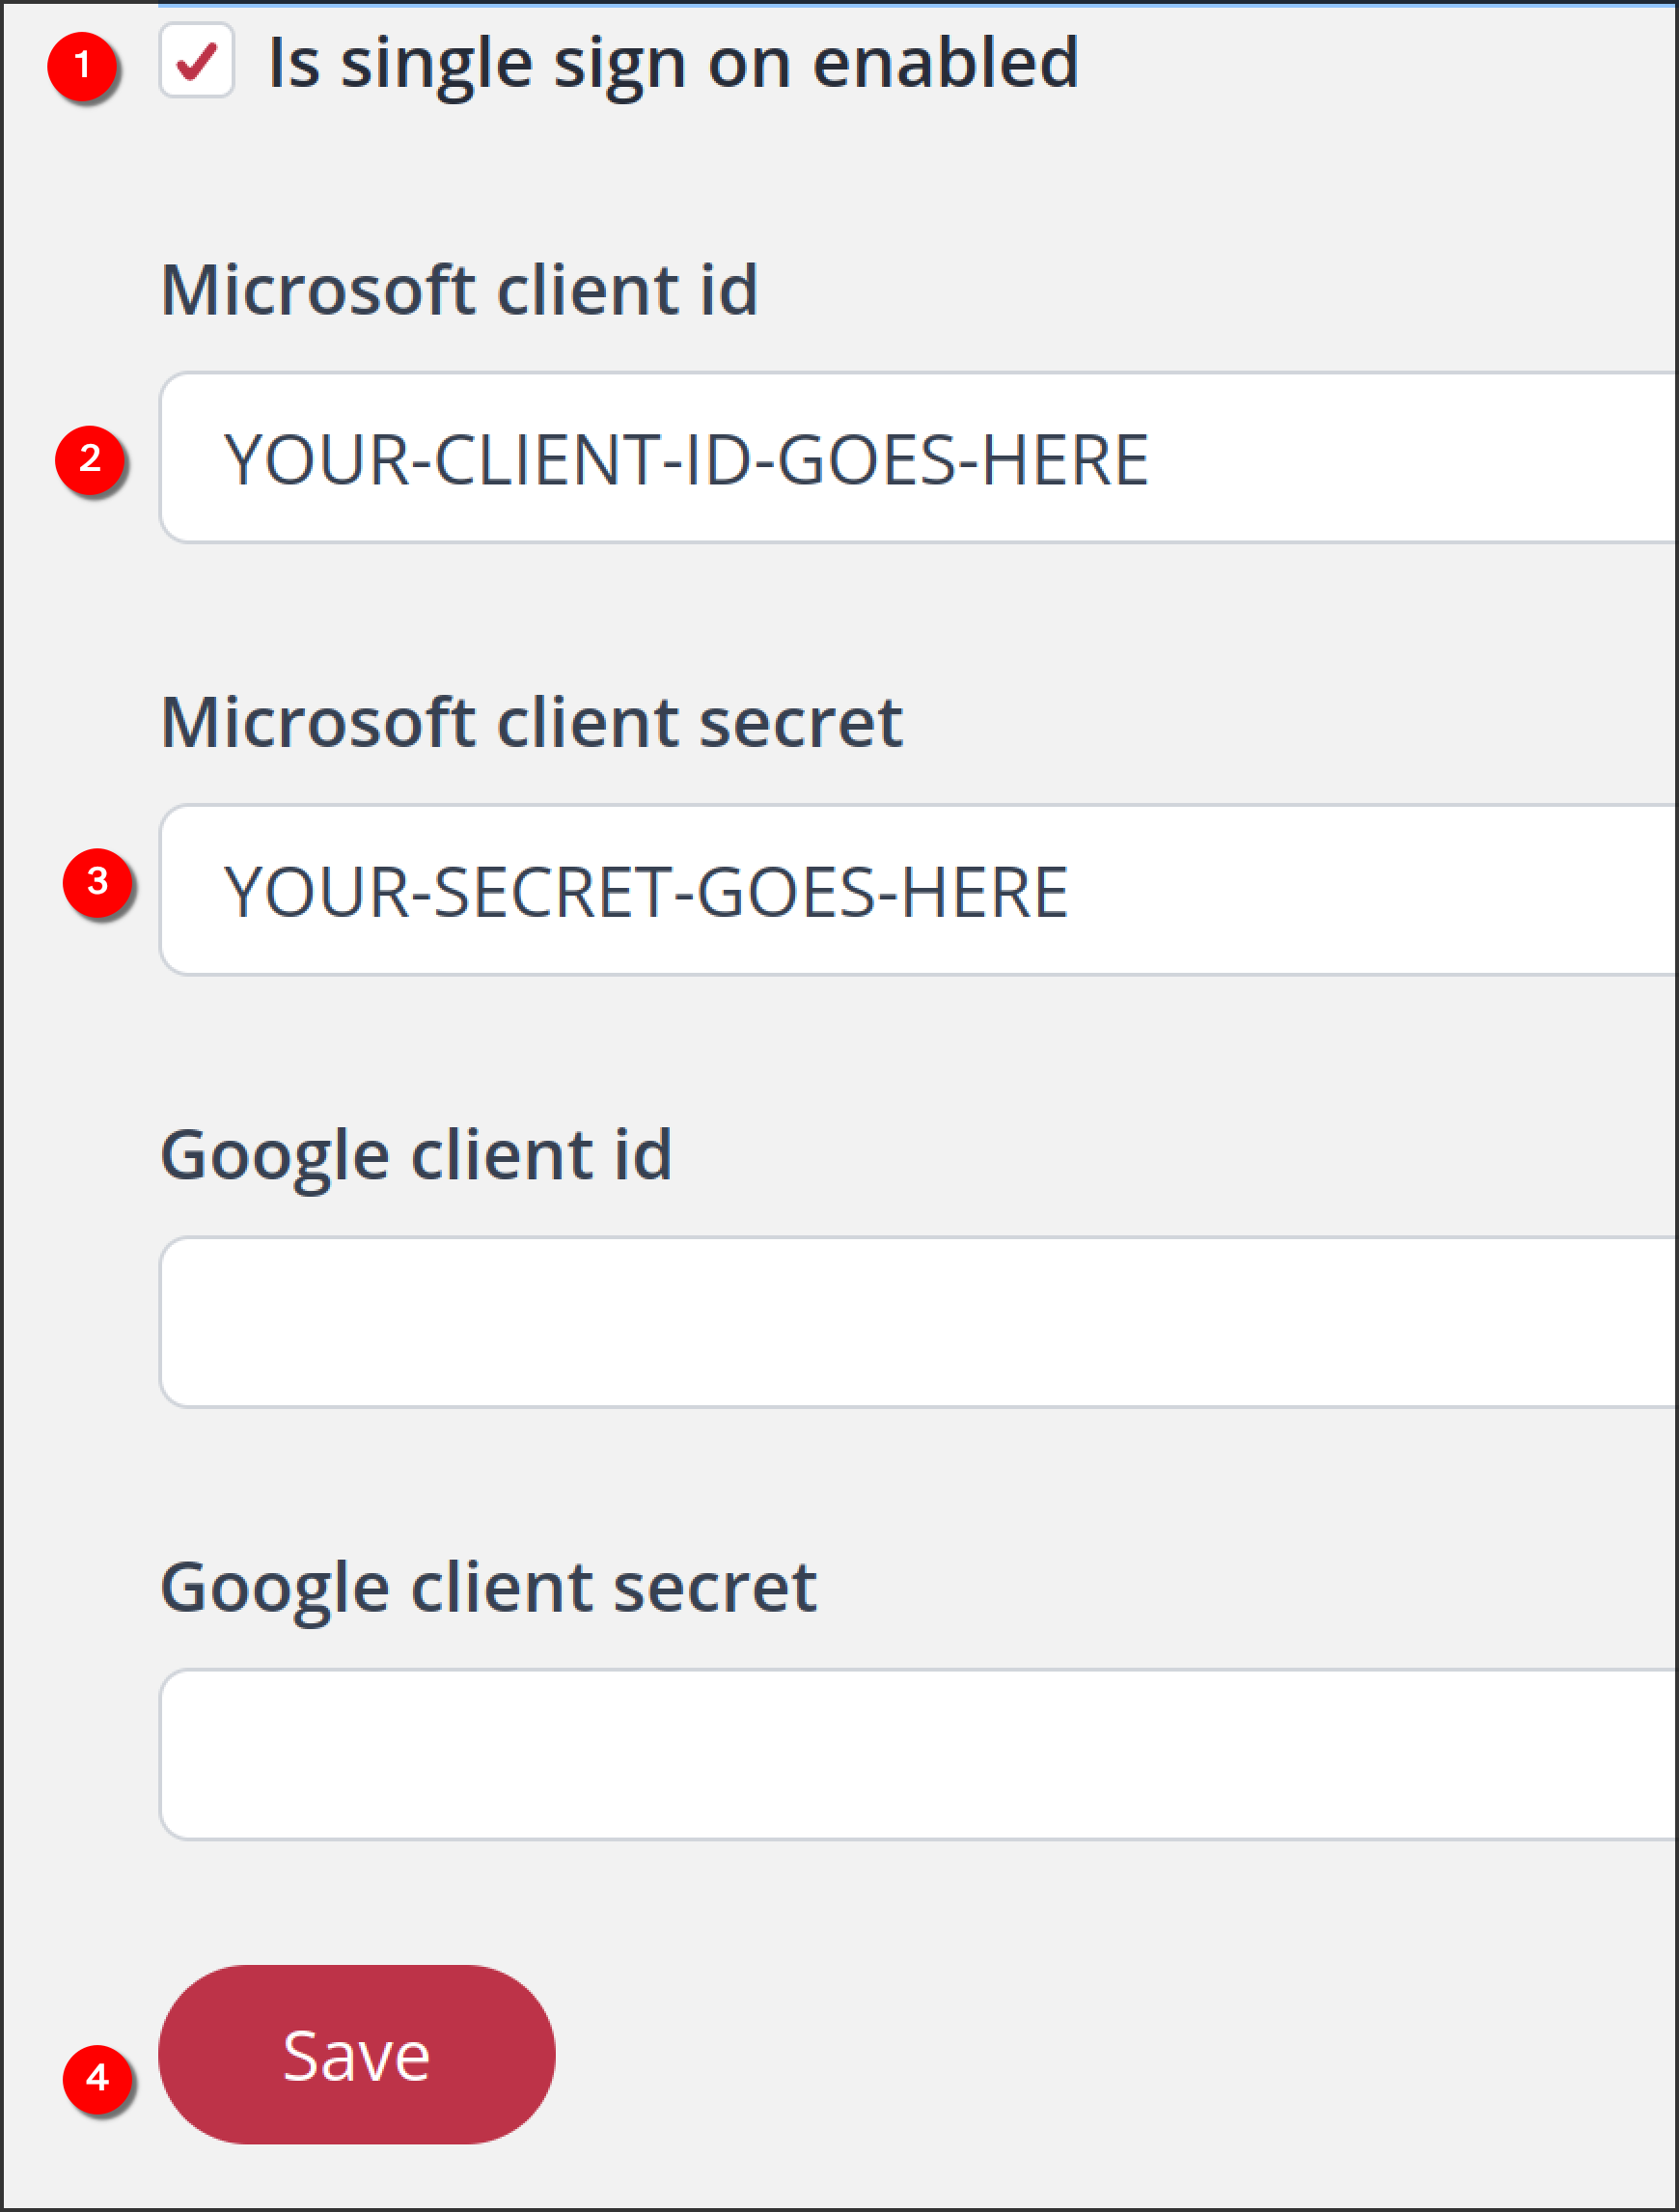
-
In the "Microsoft client ID" field, enter the app ID that you noted down previously. You can always go back into your Entra dashboard to view this if you forgot to note it down previously.
- In the "Microsoft client secret" field, enter the secret that you noted down (remember, you can't view this again, so if you didn't note it down you'll need to create a new secret)
- Press "Save"
Testing
To test your Microsoft SSO configuration, log out of the Dashboard (bottom left of the screen) then go back to the login screen. You should now be presented with a button allowing you to log into your Dashboard using your Microsoft account.
Configure Google Workspace SSO
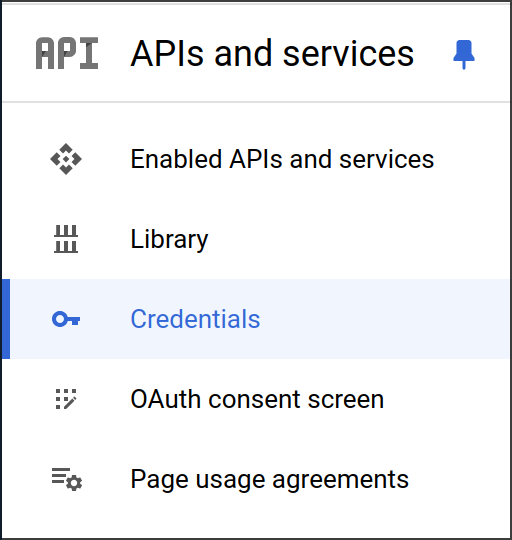
- As an administrator, go to the Google Developer Console
-
Click on "Credentials"
-
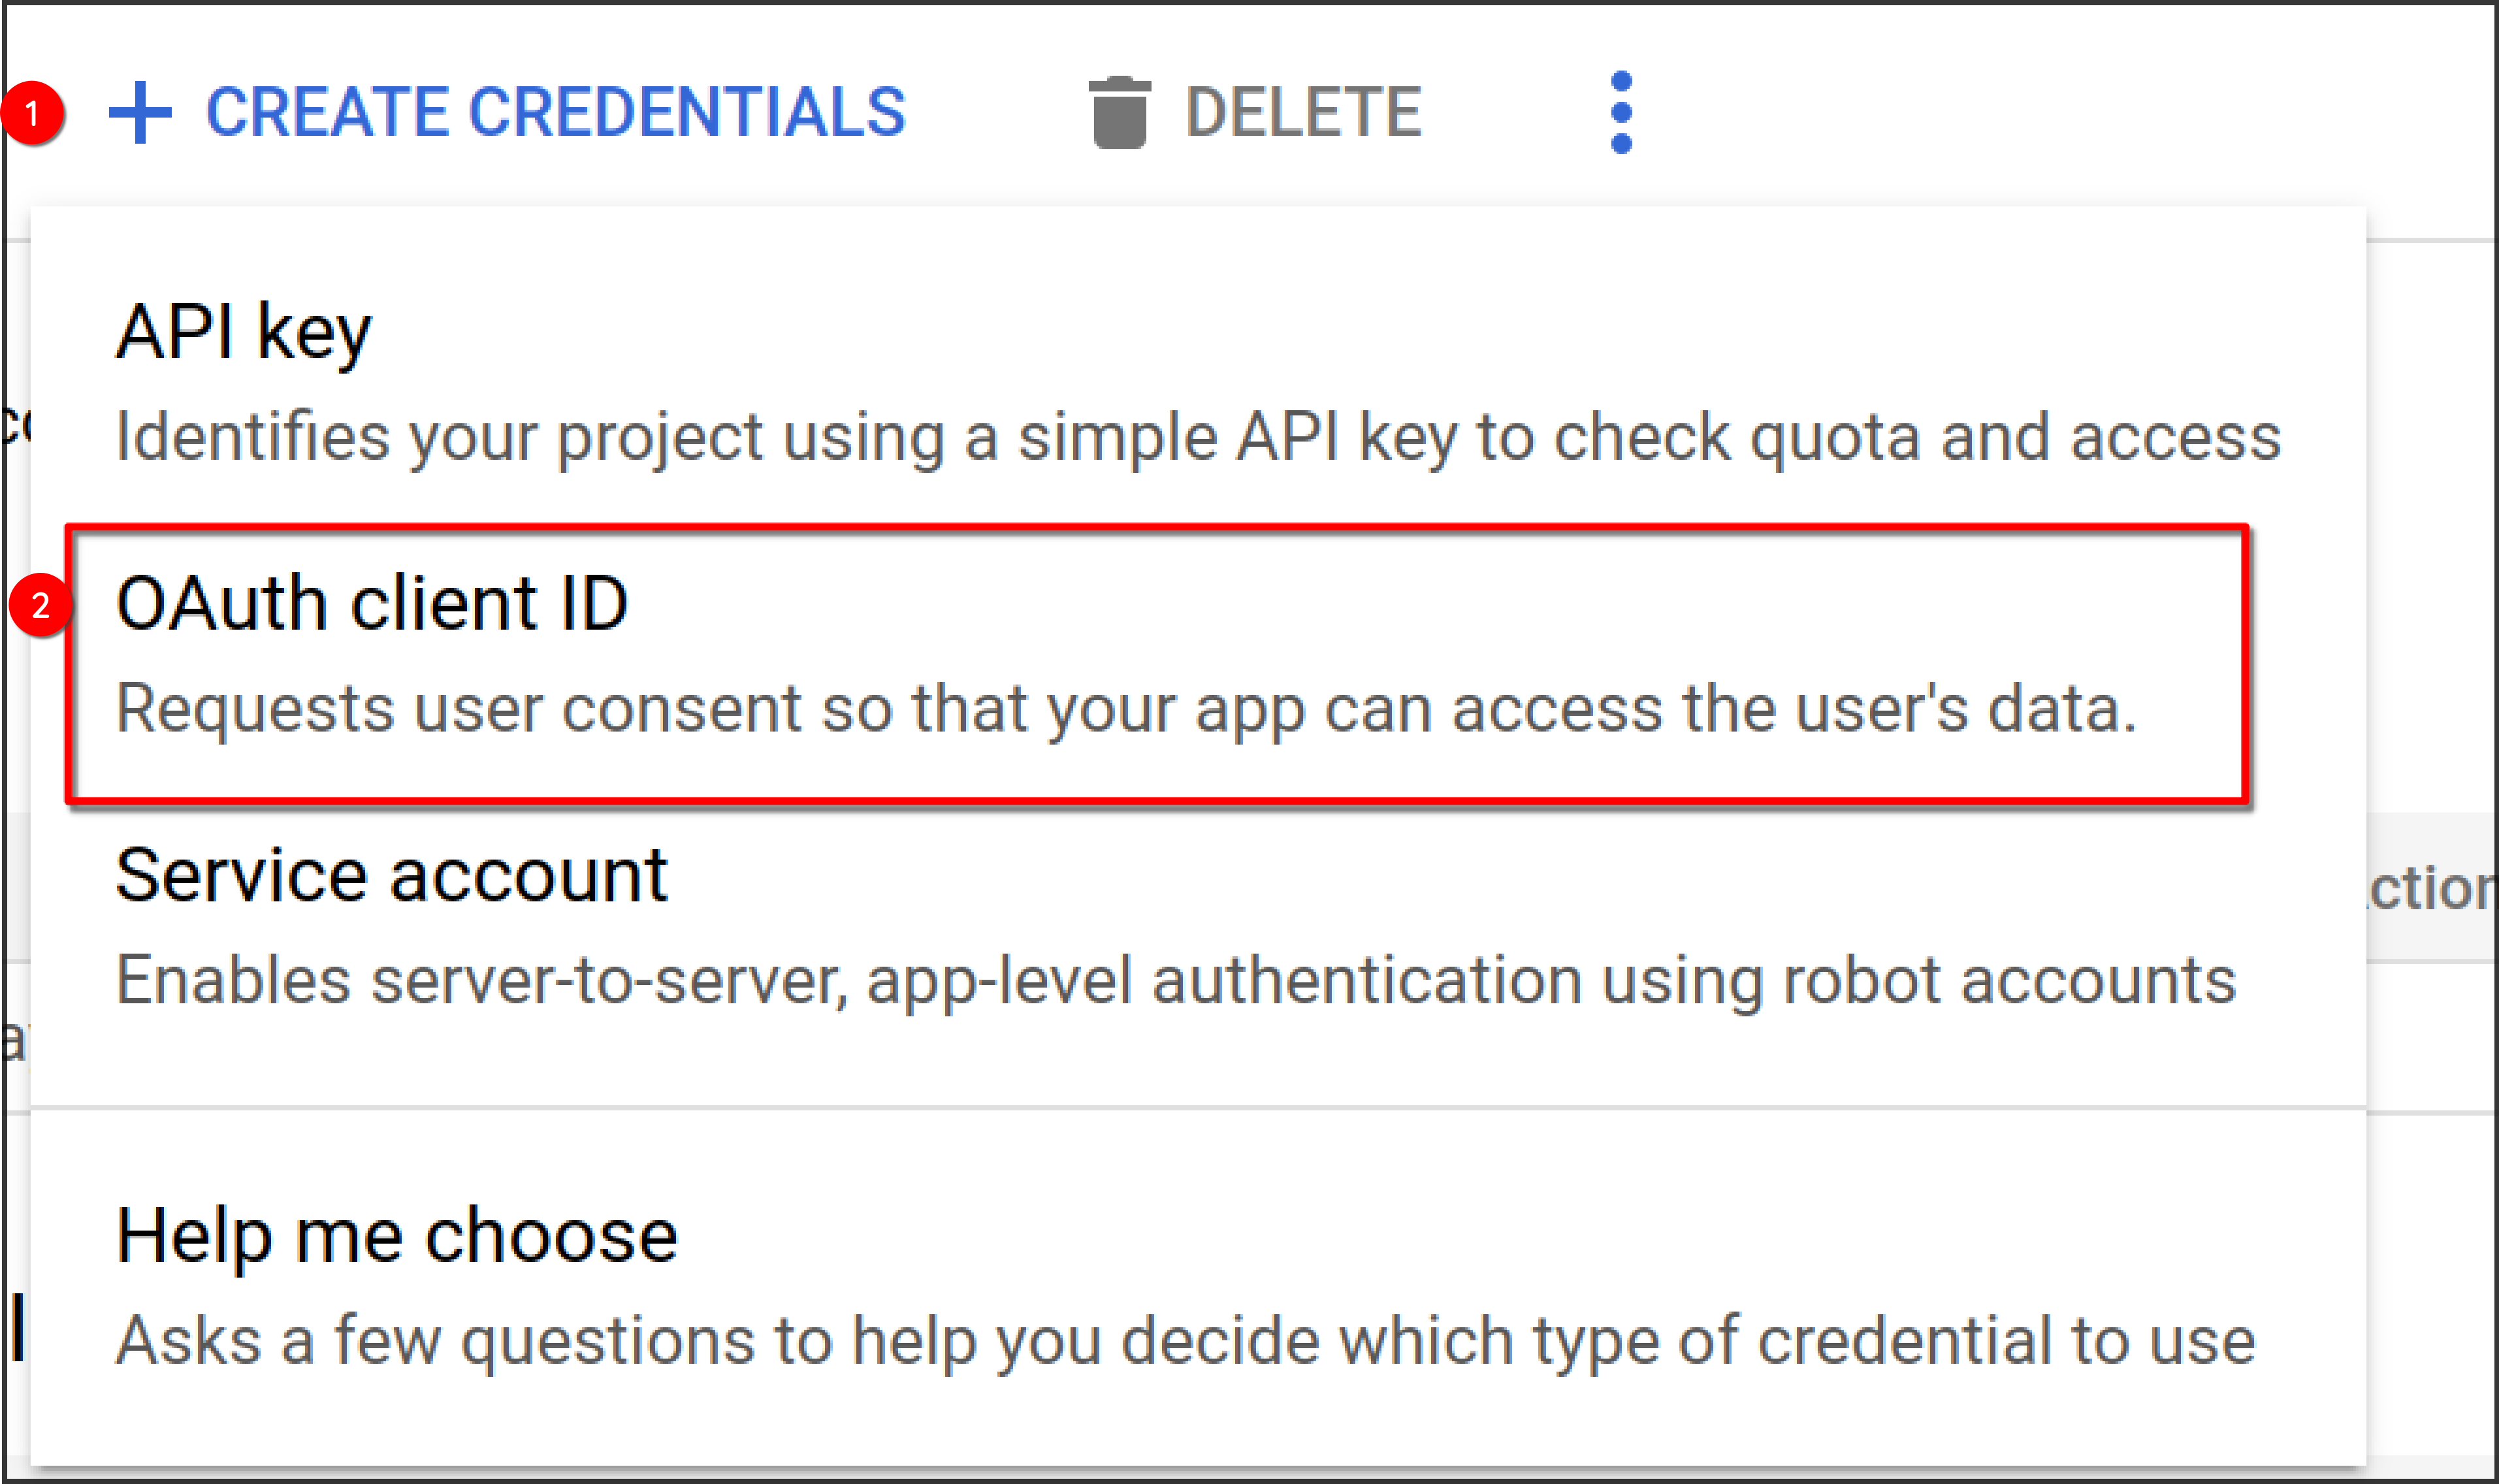
Select "Create Credentials" > "OAuth client ID"
-
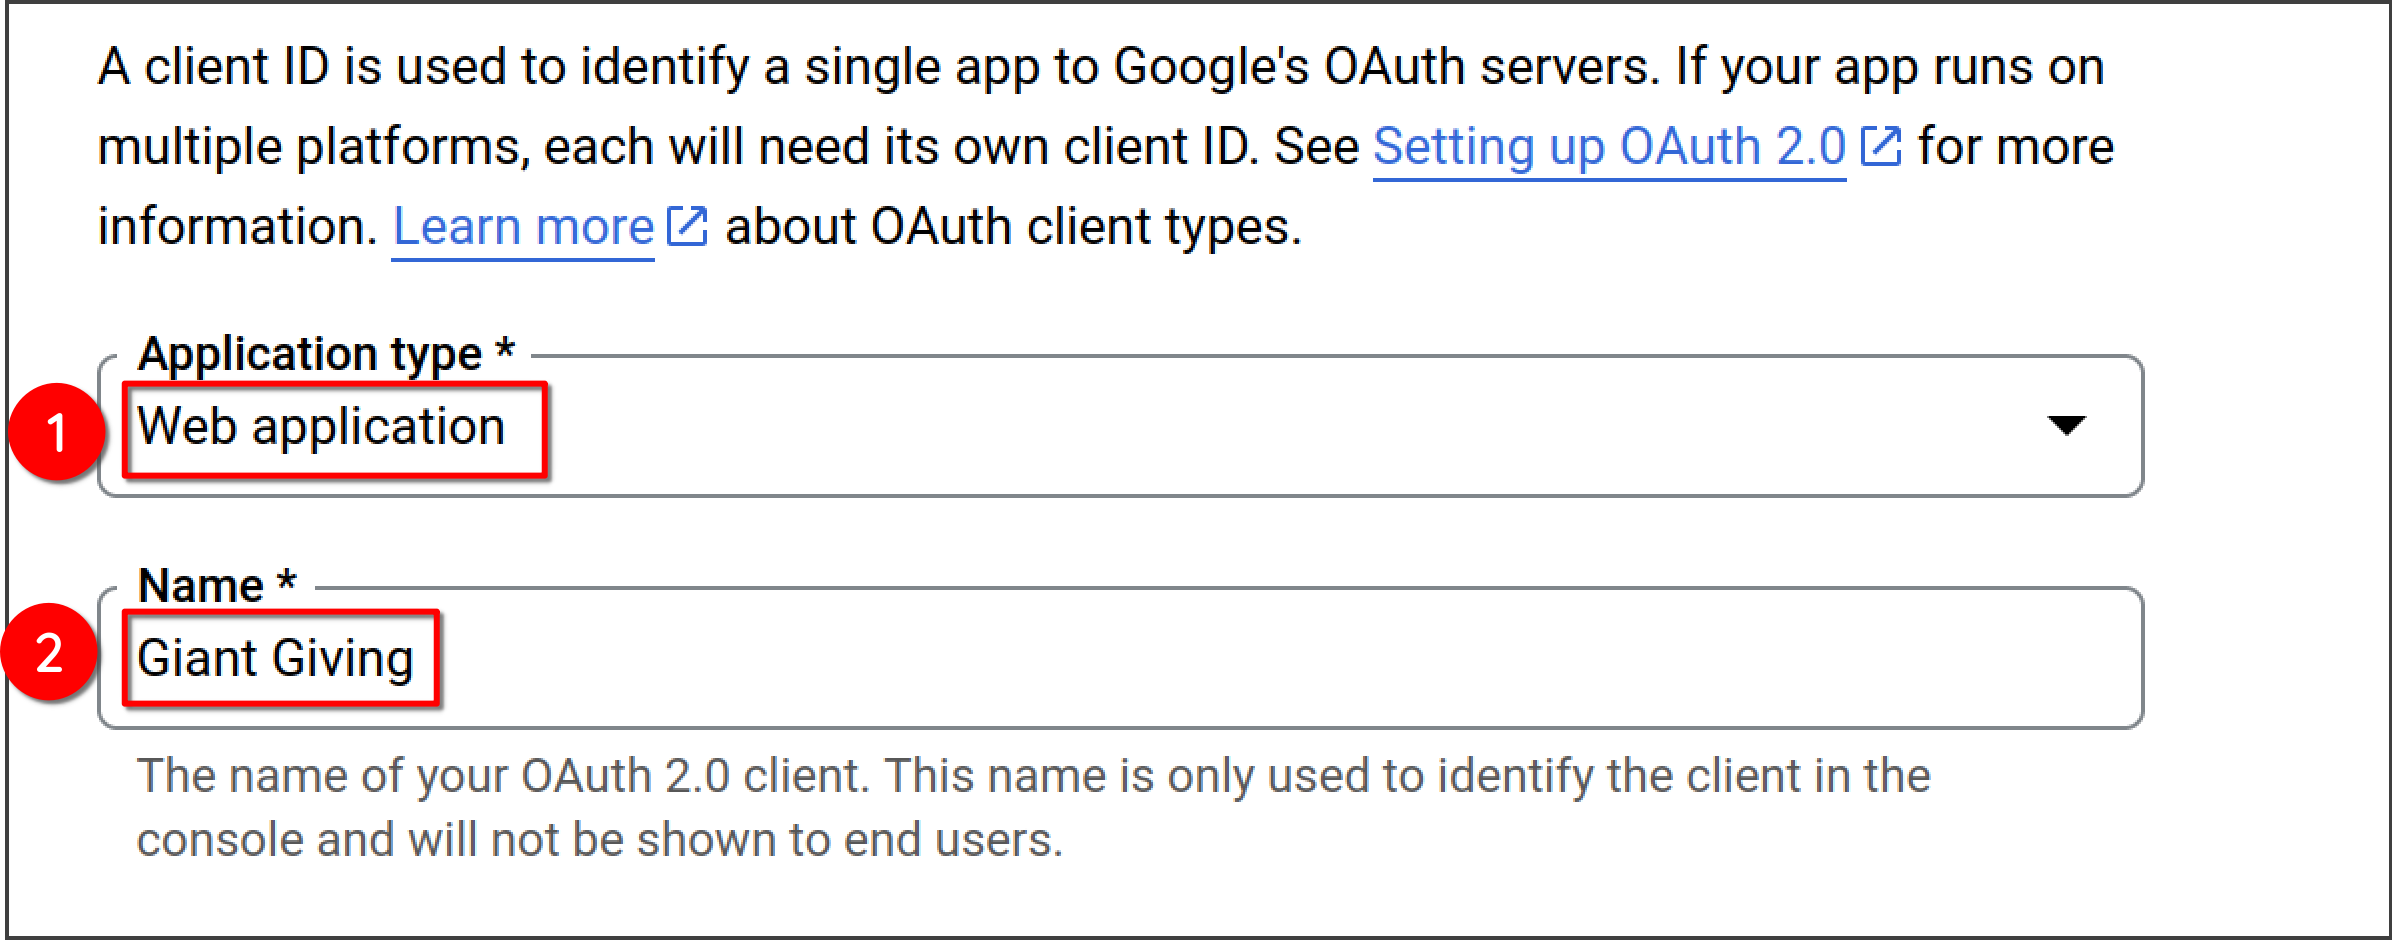
Under "Application type", select "Web application, then enter a name. This can be anything but we recommend Giant Giving so that you can recognise what this is for in the future.
-
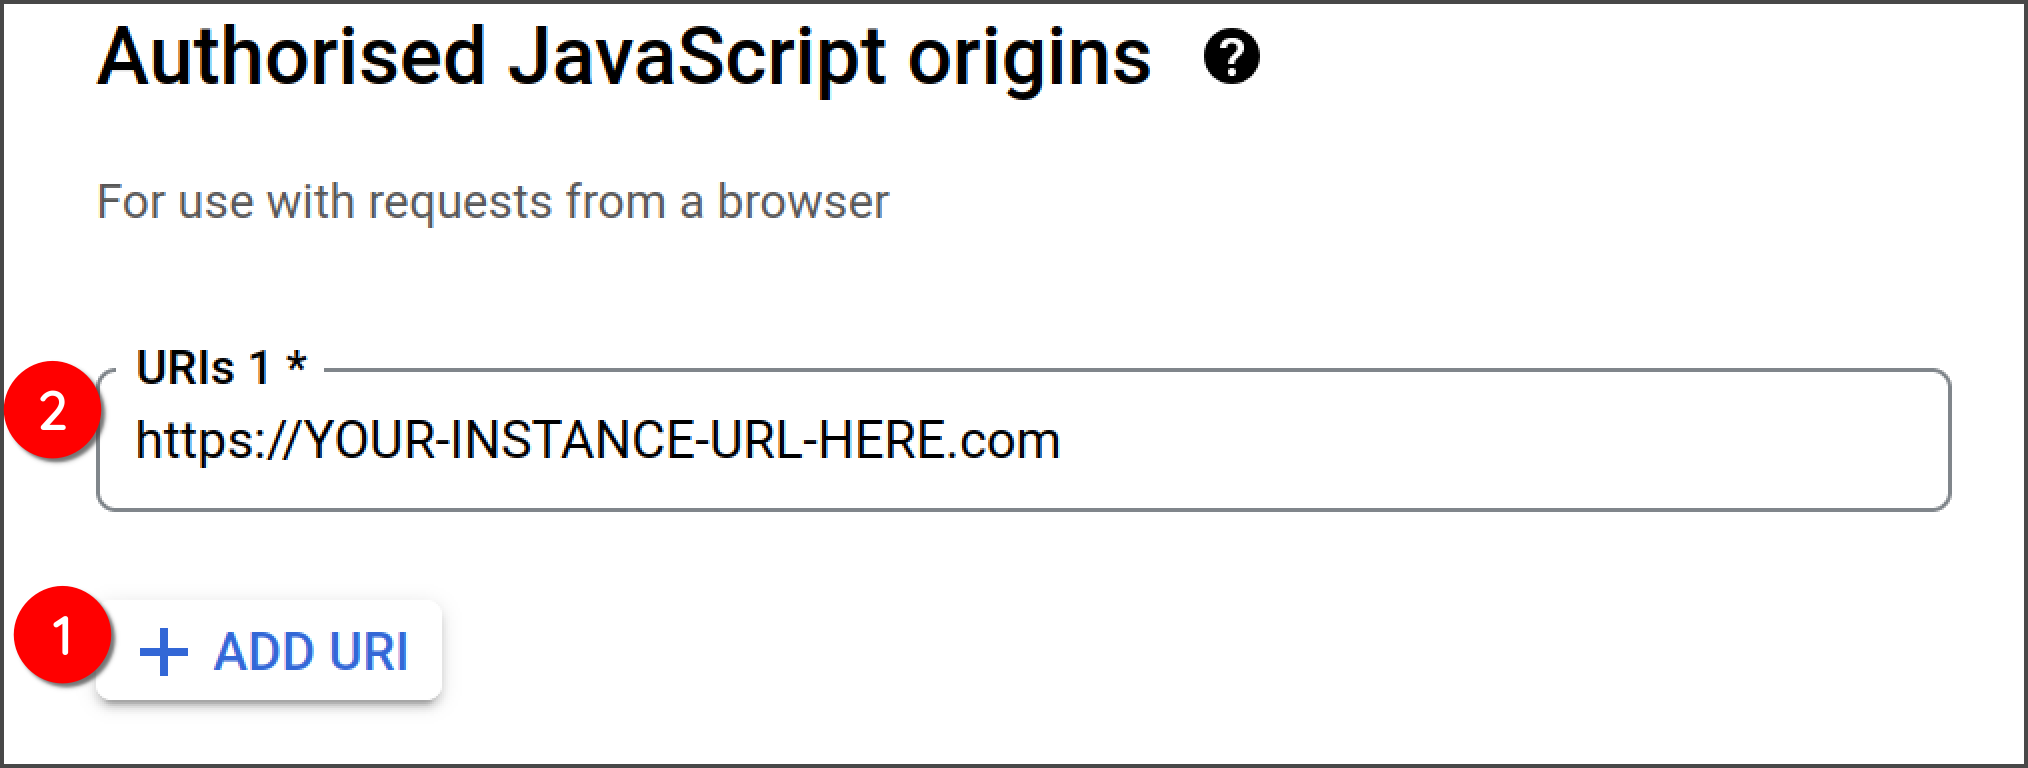
Within the "Authorised JavaScript origins" section, click "Add URI" and enter the full URL to your Giant Giving instance
-
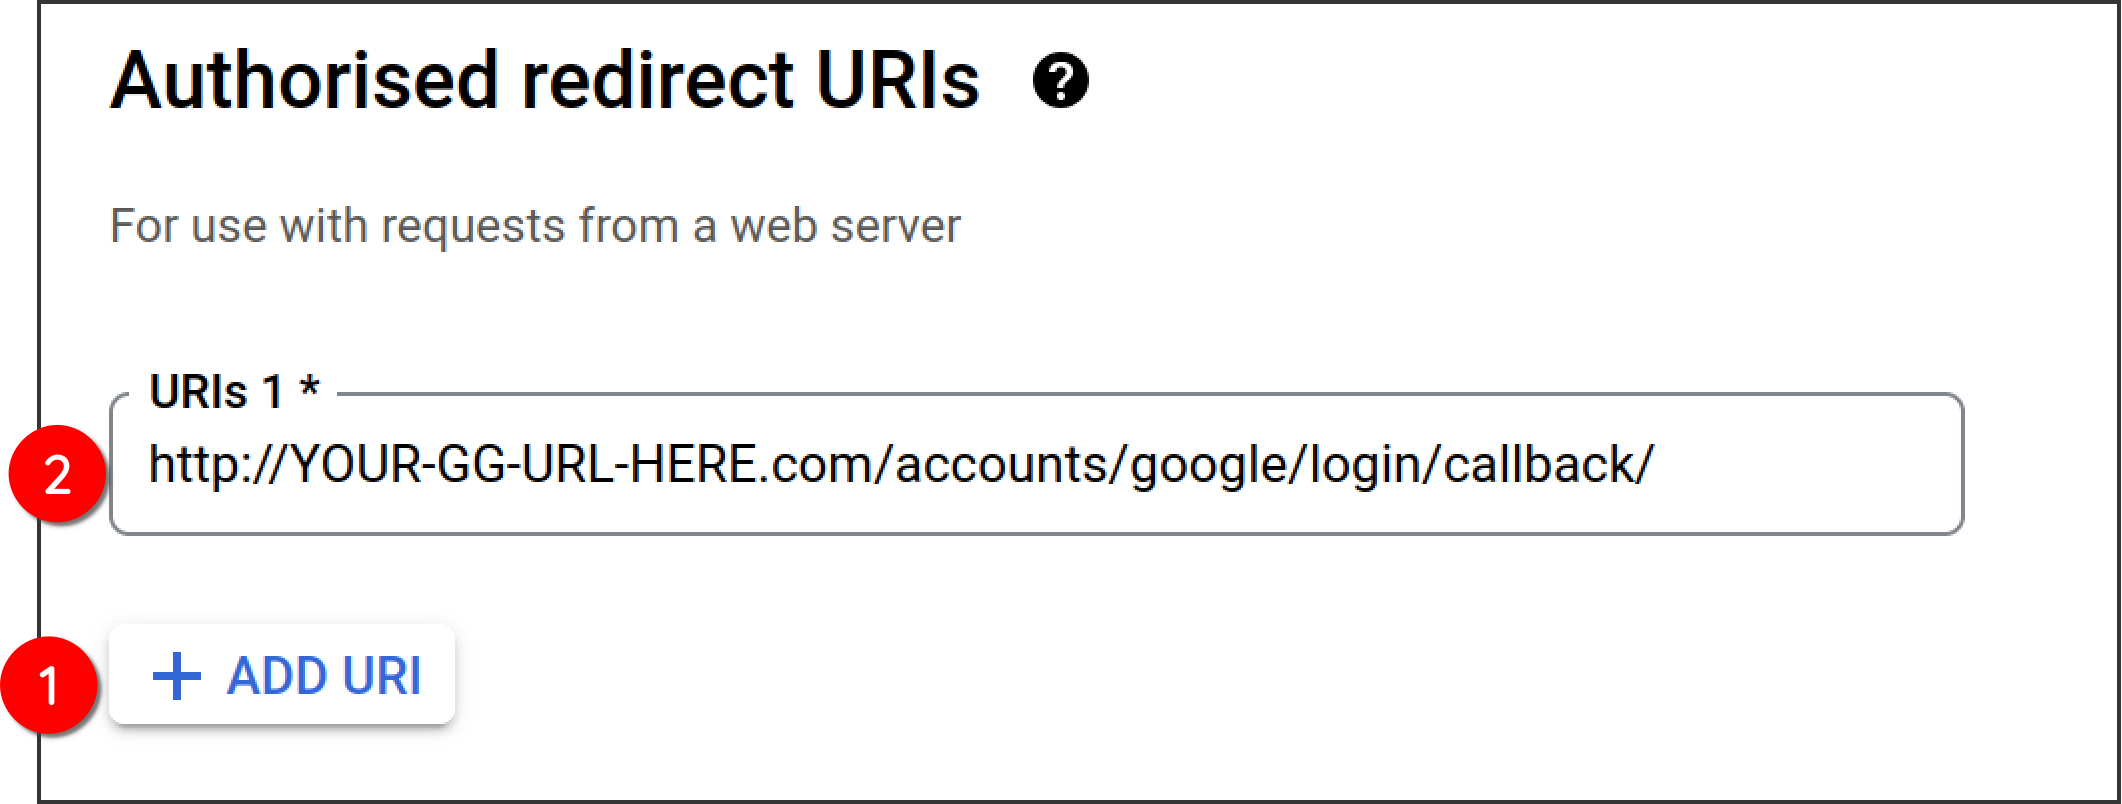
Under the "Authorised redirect URIs section, click "Add URI" then enter the following: http://YOUR-GG-URL-HERE.com/accounts/google/login/callback/ then click "create" Take a note of your client ID and secret
-
Select "OAuth consent screen" and fill out the details as requested
Upcoming changes
Google are due to change this screen with a "new experience" very soon, so these instructions may not be valid.
User Type
It is absolutely crucial that you do not make this application "external". For "User Type" please ensure that you select internal
If you make the application external, anyone with a Google account will be able to request an account on your Giant Giving instance. While they would not be able to actually log in until an administrator activates their account, it is better to prevent the accounts being requested in the first place from a security point of view.
-
Go to your Giant Giving Dashboard and navigate to "Settings" > "Single sign on"
- Tick the box that says "Is single sign on enabled"
- In the "Google client ID" field, enter the app ID that you noted down previously. You can always go back into your Google dashboard to view this if you forgot to note it down previously.
- In the "Google client secret field, enter the secret that you noted down
- Press "Save"
Testing
To test your Google SSO configuration, log out of the Dashboard (bottom left of the screen) then go back to the login screen. You should now be presented with a button allowing you to log into your Dashboard using your Google account.